How to make healthy and delicious Kombucha !


How to make delicious and healthy Kombucha
I love to make fermented tea "Kombucha" and am excited to share the simple steps to making your own. It might seem
scary or difficult but there is really nothing to it once you get started. If you have ever tasted store bought Kombucha then you will love making your own and sharing it with your friends and family. Making it at home costs you pennies compared to the bottles in stores for up to $7 .

The Mother or Scoby....
Where it all begins:) with the mama!
You will need to find someone in your community that makes Kombucha, so you can adopt one of these babies to start your brew!
This kinda scary looking thing is called the Scoby, it is the active ingredient in Kombucha tea that makes it all possible.
In the community of people who make Kombucha we like to call this big blob a mother...much nicer than Scoby i think :)
This 'culture' is what forms in your tea, and when your jug has finished fermenting you will divide the mother and the resulting pieces that you share with others are commonly called the 'babies'. You can share your kombucha babies with friends or tie into the Kombucha community in your area and share with them. There is no fermented tea without one of these little guys...only a face a mother could love;)
")
Lets get ready to have some fun
The things you will need
-Set a pot to boil with 4 quarts of filtered water preferably.
-Add 1 cup of white sugar to the water and dissolve . Dont forget this step as the live cultures feed on the sugar. By the time your Kombucha is ready to drink in about 10-14 days...all or most of the sugar will be digested and gone!:)
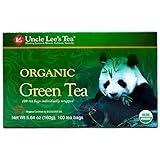
-Once the water is boiling turn it to low/simmer and add 4 organic green tea bags or other organic tea that is caffienated .
-At this stage you can also add, other healthy herbs to the water such as dried Nettle leaves. Nettle is a really good liver detoxifier. I add 1/2 cup to my batches.
-I have grated about 1/4 cup of organic ginger into all of my teas as i love the flavour it imparts on the Kombucha and it has many health benefits as well.
-Let your blend simmer for 20-30 minutes, then remove from heat and let cool to room temperature before proceeding.
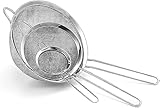
To make the process easier - The right tools are always key!
Just a few things you will need for the journey to becoming a Kombucha parent:)


Almost there:)
Come on over here baby...lets make tea;)
Once your tea has cooled to room temperature you will strain it into the clean Gallon Jar where your baby is waiting with at least one cup of kombucha that the baby was reserved and given to you in.
If you dont cool the tea the heat will kill the baby and there will be no tea!:)
Strain the tea into the jar , cover with a papertowel , a piece of cheesecloth that is folded a few times to keep dust and bugs out of your yummy starter. A big elastic band will hold your cloth over the top nicely. Make sure you dont suffocate the brew by having too many layers of cheesecloth....it needs to breath.
")
Now you wrap the tea blend and her baby up and wait....
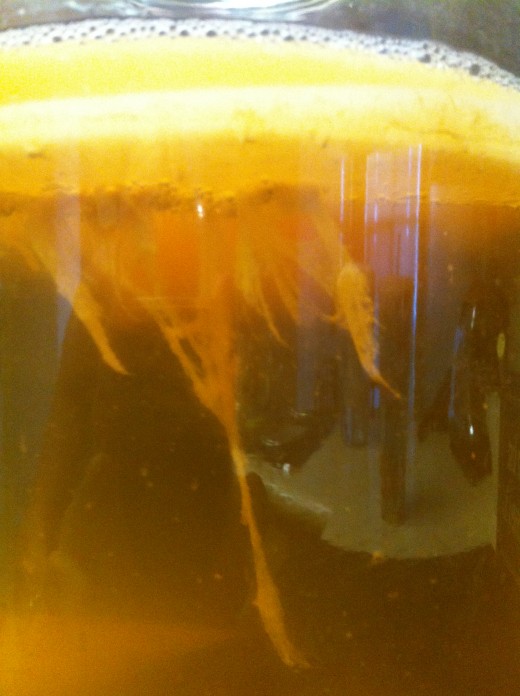
Now that your tea blend is in the jar with the baby, all you have to do is put the covered jar in a cupboard or closet away from drafts and protect it from light as much as possible. I like to wrap my jar in a dish towel to make sure its warm enough and safe from light. After about 3-4 days you should see a light layer forming on top of your brew, and some brown and white strands swimming about in the jar....this is normal . The only thing you DONT want to see is mold...if any mold forms the batch must be tossed out. I have never had mold yet and you can lessen your chances of mold by making sure it is covered with a breathable cloth, and keeping away from any bread products . You may end up with fruit flies if its a warm season and if you do dont worry...as annoying as they might be fruit flies actually have a purpose as they deliver certain good bacteria. Who knew right!:) Update....I have found that using a 'nut bag'...you know the one you use when making your homemade almond milk....its very sheer...works well to be the cover for the jar so the dust and bugs stay out! You could also use a nylon little sock..you know..a sheer one...an anklet...or sock'ette':) can buy at the local drugstore:)
(For the fruit flies, put a little container of Apple cider vinegar on your counter with a drop of dish soap in it...the flies will go to the vinegar and drown. And make sure you use the drop of soap or they will just land on the vinegar,eat...and run. The soap breaks the surface of the vinegar so they go under it instead of on it... )

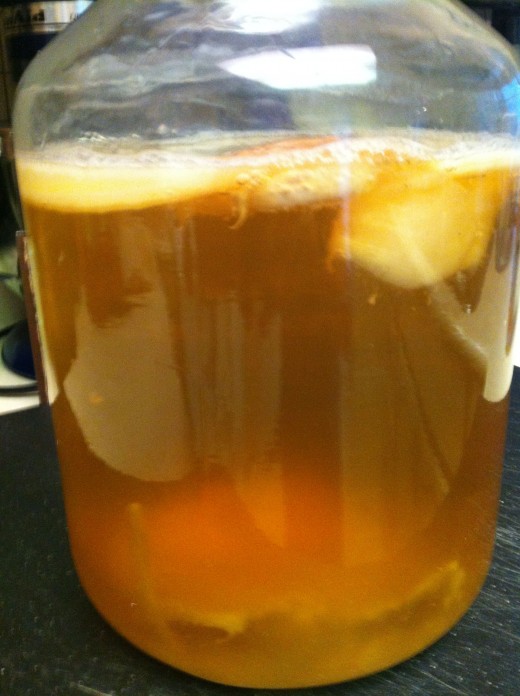
What should it look like as it progresses?
Ugly yes, tasty....oh yes!
Your first batch will feel a bit intimidating but feel good knowing that i too was once a newbie at this process and am still alive to tell the tale;) This tea has been used for thousands of years in the Asian culture as a tonic...and that is exactly what it is. I drink about 1/2 cup a day maximimum for its ability to promote good gut flora. This is tasty stuff but not meant to be consumed like pop or any other beverage for thirst sake.
")
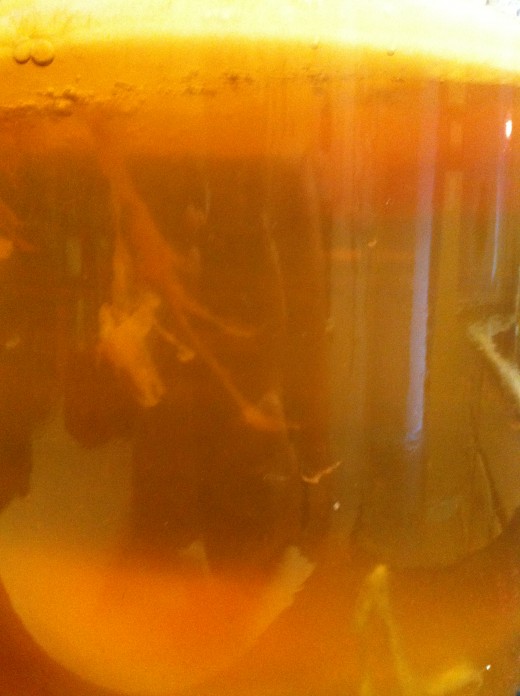
By the 3rd week or so this is how it should look
I let my tea /kombucha ferment for around 3 weeks but others like to bottle it at about 10 days or so.
After about 4 days dip a little spoon into your batch and have a taste, each day that passes will have your blend tasting different. Each day that passes the Kombucha culture eats more of the sugar.....so....for a sweeter tea ferment for fewer days. For those like myself who enjoy their Kombucha on the more tart side then leave your tea to ferment longer.
I bottle mine after about 3 weeks by ladling or pouring my brew through a funnel into prepared bottles as shown in the first picture:) Leaving your bottles of Kombucha out at room temperature will find the blend fermenting each day and it developes a bit of an effervesant quality that i love! If you prefer your brew to taste the way it does the day you bottle it then put your bottles into the refrigerator so the fermentation process stops.
You will need good sturdy bottles


Now what?
Once you have filled your bottles, make sure you have reserved enough Kombucha for your babies if you plan on sharing them with your friends. , or saving one or 2 in your fridge for future use in case a batch fails due to mold .
I reserve some kombucha before bottling so i have enough to keep the babies immersed in...1-1/2 cups per baby.
Decide how many babies you want to keep or share , and have jars ready to go when its time to bottle.
Remove the mother from the main jar and you will see that the top layer will be thick and will seperate fairly easily from the bottom / darker layer. Reserve the top white layer and cut into as many babies as you want to save. Use one for a new batch of your own Kombucha. I always start a new batch the day i bottle my fermented brew:)
Put your baby in your gallon jar and begin again!
Preserve the other babies for sharing in jars with lids that contain 1-1/2 cups of the reserved Kombucha.
Save the babies in jars in the fridge until ready to use, preferably within 2 months .
I hope this all made sense and enjoy!

Time to enjoy:)
There are endless teas that you can try and variations of flavors you can experiment with. Have fun and enjoy:)
Heres to good health and sharing the way:)
"Baby , Baby ...you'll get hooked on me"!
— MoiDifferent 'Normal' stages of your Kombucha - Wierd looking but all normal i assure you! :)
Click thumbnail to view full-size


Would love to know your thoughts or if you make and enjoy Kombucha. Any questions are welcome:)


